Modifying Performance Settings
Modifying Performance Settings
In case of dealing with a very large number of parts, you can modify the Performance Settings to improve the speed of operations as needed.
To Modify Performance Settings
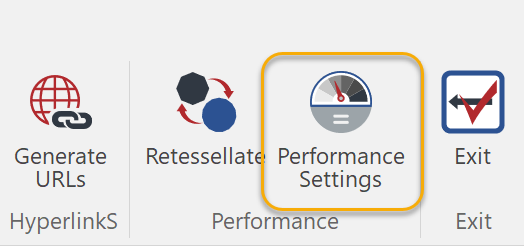
Click Performance Settings in the 3D Edit tab of the Ribbon.

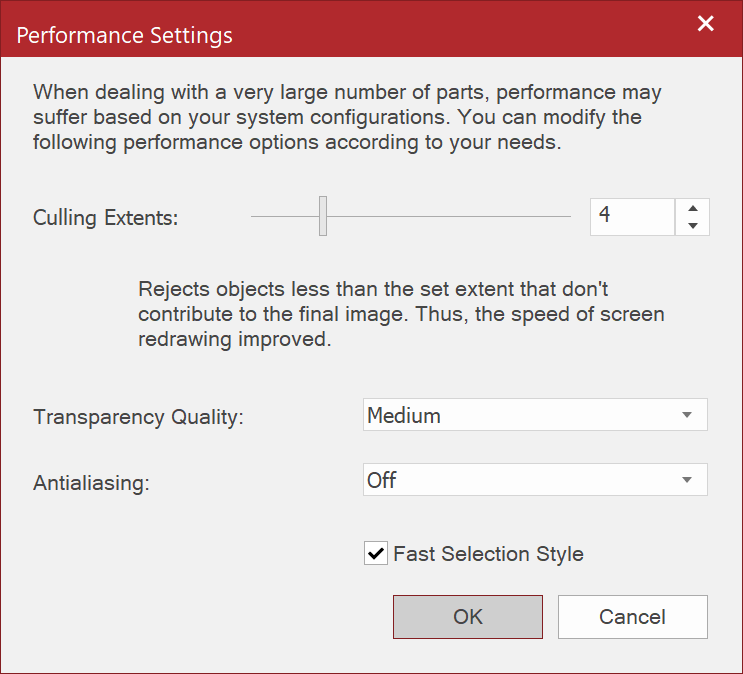
Modify the options in the Performance Settings dialog box.

Click OK.
Performance Settings
There are 4 settings which affect the screen drawing and performance.
Options | Description |
Culling Extent | Rejects object less than the set Extent that don't contribute to the final image. Set it between 1 to 20. The Extent is set to "4" pixel by default. When it is set to "1", the culling is off. |
Transparency Quality | Sets Low (Fastest), Medium, or Best (Slowest). Medium is selected by default. |
Antialiasing | Sets Off (Fastest), Low, Medium, or High (Slowest). This option is Off by default. |
Fast selection style | Selecting this checkbox drastically improves the performance of selection drawing for large assemblies. However, selection highlight of selected objects that are blocked by other parts will not be seen through. |
Related Articles
Editing Animation Effect Settings
To Edit Effect Settings Effect keys can be moved or copied like any other keys. When hovering one of Effect keys, a pair of the keys will be highlighted like the screenshot below. You can do the following: · Drag the left or right side of the ...Retessellating the 3D Model
Retessellating the 3D Model The Tessellation setting affects the number of polygon points, which influences the overall smoothness of curves on the 3D Model appearance. In general, performance of drawing the 3D Model may decrease as the level of ...Release Notes
Release Notes: Version 5.6 Release Notes: Version 5.4 We are excited to announce the release of Canvas Envision 5.4! This update includes several new features and improvements designed to enhance your experience. Below are the details of what's new ...Display Pivot on Each Part
Display Pivot on Each Part Sometimes each part may have its own pivot location and/or orientation. When you select more than one part, the pivot for the selection will be displayed by default. But you can display pivot on each part for checking or ...Displaying Specified Range of Frames
To Display Specified Range of Frames 1. Right-click in the Animation Timeline pane. 2. Select Timeline Settings from the context menu. 3. Set the Start and End frames or Start frame and Length in the Time Settings dialog box. 4. ...
Popular Articles
Release Notes
Release Notes: Version 5.6 Release Notes: Version 5.4 We are excited to announce the release of Canvas Envision 5.4! This update includes several new features and improvements designed to enhance your experience. Below are the details of what's new ...Cloud Administration
This topic applies only to Envision Workspace Administrators. Workspace Administration Canvas Envision Administration allows Workspace Administrators to manage their workspace. In Administration, the Workspace Administrator can create and manage: ...Video - Canvas Envision Cutting Planes
Video - Canvas Envision Auto Trace Tool
Video - Canvas Envision Annotation Lens
Recent Articles
Release Notes
Release Notes: Version 5.6 Release Notes: Version 5.4 We are excited to announce the release of Canvas Envision 5.4! This update includes several new features and improvements designed to enhance your experience. Below are the details of what's new ...Administrator Area
Printing an .evDoc
Closing an .evDoc
Aligning Pivot Points